Moving your Sync folder to a new location
You can move your Sync folder to a new location on your computer, onto an external drive connected to your computer, or to a new computer.
Moving to the same internal hard drive: Moving the Sync folder to a new location on the same internal hard drive can make your files in Sync easier for you to access. For example, you could move the Sync folder to your Desktop.
Moving to an external drive: You can move your Sync folder to a USB attached external drive to free up space on your internal drive and/or provide more storage space for the Sync folder. Your external drive should be permanently attached, as the Sync folder must be available before the Sync app starts. Sync won’t work correctly if the external drive becomes inaccessible or disconnected.
Moving to a new computer: You can manually move your Sync folder to a new computer, to avoid having to re-download your files from the cloud when re-installing Sync.
In this article:
- Moving the Sync folder to a new location on the same computer or to an external USB drive
- Moving the Sync folder to a new computer
Moving the Sync folder to a new location on the same computer or to an external USB drive
Overview: The easiest method to move your Sync folder to a new location is to Pause Sync, then manually move the Sync folder from the current location to the new location using Windows File Explorer or Mac Finder. When you resume Sync, the app will prompt you to locate the Sync folder at the new location.
Show on Windows Show on Mac
Steps:
- Click the Sync icon on the Windows system tray or the Mac menu bar.
- Click the Settings icon (cog) and select Pause Sync.
- Navigate to the location of your current Sync folder using Windows File Explorer or Mac Finder.
- Highlight and right click the Sync folder and select Copy or Cut.
- Navigate to the new location using Windows File Explorer or Mac Finder.
- Right click and select Paste. This will copy or move your Sync folder from the current location, to the new location.
- If you copied the Sync folder you’ll need to delete it at the original location.
- Once the copy is complete (and the original folder removed), click the Sync icon on the Windows system tray or the Mac menu bar, click the the Settings icon (cog), and select Resume Sync.
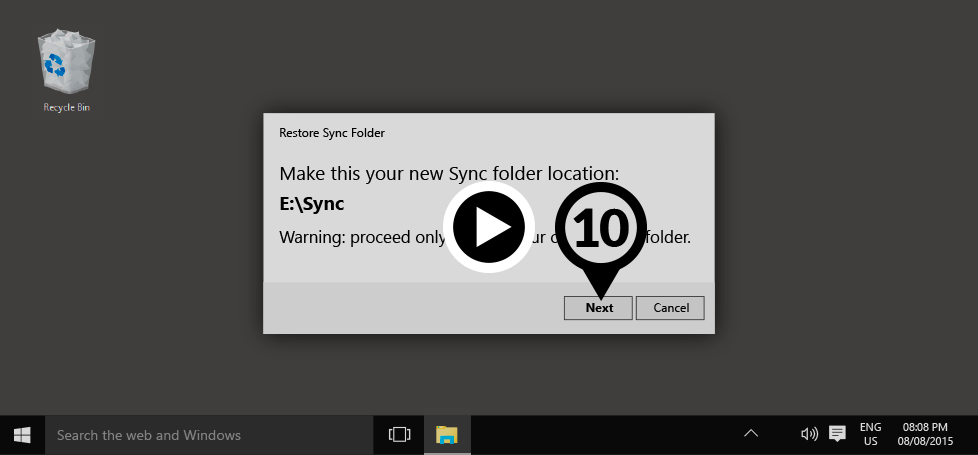
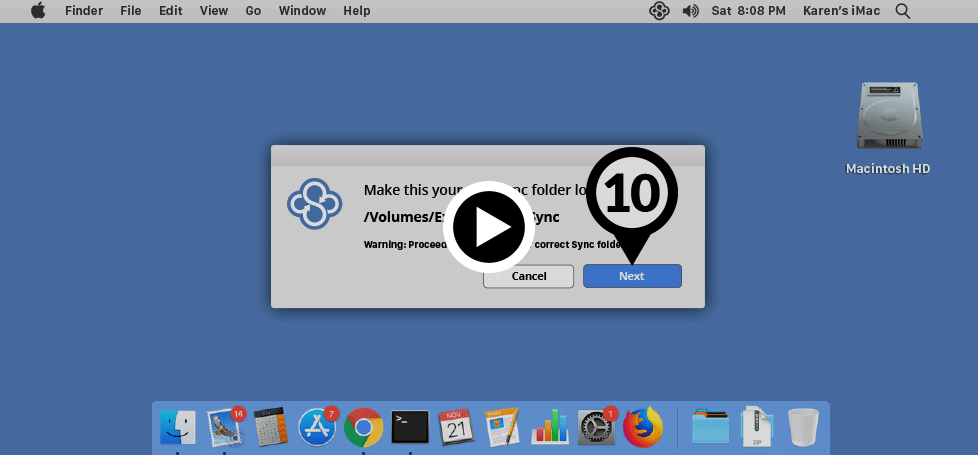
- The Sync app will prompt you to locate the new Sync folder. Click Next.
- Navigate to the new Sync folder location, highlight the folder (but don’t navigate into it), and click Select Folder or Open.
- Click Next to confirm.
That’s it, you’ve now successfully moved the Sync folder to a new location. The Sync folder may still exist at the old location. You can safely delete the Sync folder from the old location.
Caution:
Network file systems are not supported: Sync does not support network attached drives or network file systems, as file update events are not sent by network storage. Sync won’t work correctly if the Sync folder is located on a network drive.
Removable media is not recommended: SD cards, USB “thumb drives” and other devices that are removed often are not recommended locations for the Sync folder, as these types of devices can cause unexpected deletes, slow syncing performance, and file system compatibility issues.
Moving the Sync folder to a new computer
Overview: You can manually move your Sync folder to a new computer, to avoid having to re-download your files from the cloud when re-installing Sync. To do so you would copy the current Sync folder onto an external drive, connect the external drive to your new computer, and then copy the Sync folder from the external drive to the desired location on your new computer.
Once your Sync folder has been moved to the new computer you can proceed to install the Sync desktop app. The desktop app installer will prompt you to select the location of your Sync folder – choose the location of the Sync folder you just copied over.
Steps:
- Navigate to the location of your current Sync folder using Windows File Explorer or Mac Finder.
- Highlight and right click the Sync folder and select Copy.
- Open your external USB drive using Windows File Explorer or Mac Finder.
- Right click and select Paste. This will copy your Sync folder from the current location, to your external USB drive.
- Eject the external drive, and connect it to your new computer.
- Navigate to the location of the Sync folder on the external USB drive, using Windows File Explorer or Mac Finder.
- Copy the Sync folder to the desired location on your new computer. Highlight and right click the Sync folder on the external drive and select Copy. Navigate to the desired location on your new computer and right click and select Paste.
- Wait for the transfer to complete.
- Once the transfer is complete, you can proceed to install the Sync desktop app. Download the app installer here: https://www.sync.com/install
- Important: When the desktop app installer prompts you to choose a location for the Sync folder, select Browse.
- Navigate to the location of the Sync folder you just copied over, and click Select Folder or Open (but don’t navigate into the Sync folder itself).
- You should be prompted to Reuse the Sync folder. Click Next to confirm.
Sync will scan the new folder for integrity, but will not upload or download the files.